Understanding Camera Exposure, The 1st Step to Great Photographs
In today’s world of photography, everything is becoming automated. Some of it is good as it simplifies what photographers would do, in the past, it was done manually. And automation sure saves time. Unfortunately, though, it has also created a generation of “Point and Click” photographers who don’t really understand what goes on once they push the button. Some of the photos are quite good but keep in mind, that it was the camera that determined what the photo would look like. Camera exposure is a case in point.
Many of today’s “Point and Shoot” cameras are highly sophisticated. And in some cases, expensive. They are capable of doing a lot of things that larger and a lot more expensive SLR (single lens reflex) cameras can do. They can automatically focus, determine colour balance, and even the camera exposure. While this may work for someone looking to take the odd selfie or photos of the children’s birthday party, the user gives up artistic control over how the subject is photographed.
For the serious amateur to professional, all the rules of photography that were applied during the time of the old film cameras still are still applicable today. Probably, the most important is camera exposure.
Camera exposure is controlled by three important elements. They are:
- Shutter Speed
- ISO
- Aperture
Exposure Triangle
Combined, these three elements form what is called in photography circles, the Exposure Triangle:
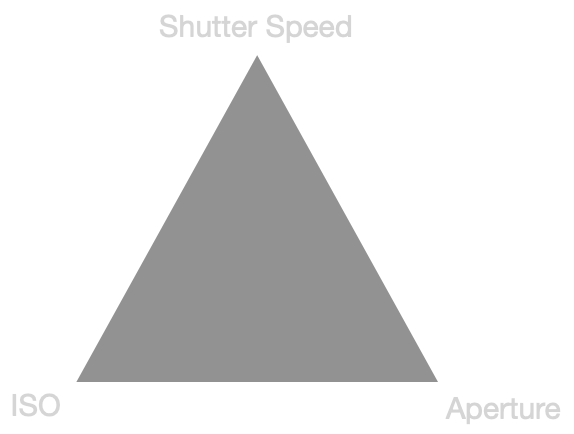
Aperture
So what is aperture? Better known as an f-stop, it is probably what you hear most about from photographers. Looking at it simplistically, your camera’s lens has blades that open and close creating an opening through which more or less light passes threw on its way to the sensor (or film). This is where it gets a little confusing, sometimes even for experienced photographers.
You will often hear photographers talking about “stopping down” or “opening up” the aperture when taking a photograph. So what does this mean?
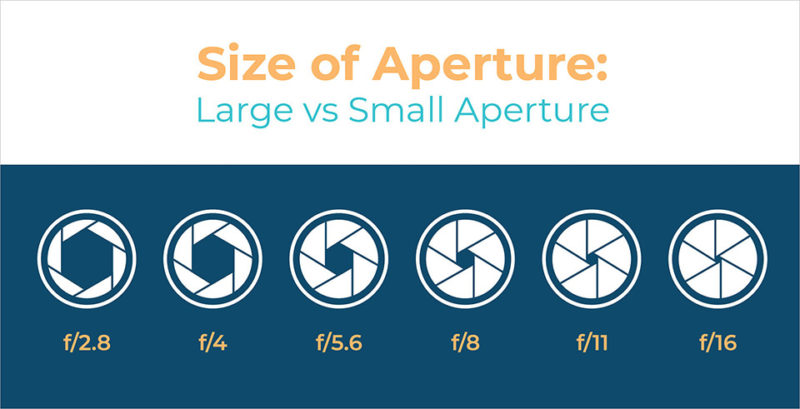
“Stopping down” basically closes the lens blades allowing less light in. And of course, “opening up” means exactly the opposite. It is not very intuitive but the more light you want to let in, the lower the f-stop and visa versa. So simply put, the f-stop is the number that shows the change in the size of the aperture opening. Why a lower f-stop lets more light fall on the sensor and a higher on less, is due to a mathematical equation (ratio) of focal distance to the diameter of the aperture opening. Unless you are a tech, you really do not need to know the math. Here is a chart to help make it clearer:
ISO
ISO ( International Standards Association ) or in the days of film cameras, ASA (American Standards Association). Basically, the ISO number determines the sensitivity of your camera to light. To explain it further, before the advent of camera sensors, a photographer would have to pick the speed of his film to suit the event that he was photographing. With landscapes, for example, the photographer could keep the camera shutter open longer (we will cover this next) so it was common to use the slowest film speed available such as ASA 25.
A sports photographer, however, would have to use a very fast shutter speed to prevent blurring. As less light made contact with the film. He would have to use a fast film speed such as ASA 800. Today’s cameras often have ISO speeds over 100,000 so just about any event can be captured. Many good quality “Point and Shoot” cameras have Auto ISO which does an excellent job of guessing. So here is a trick that many photographers use.
As we mentioned earlier, the exposure triangle is composed of ISO, Aperture, and Shutter speed. Once you determine the f-stop and shutter speed, the camera will provide automatically the ISO to give you the proper exposure. An example would be at night or in really bright situations.
Shutter Speed
The last component of camera exposure is shutter speed. Once the light passed through the lens and your chosen f-stop, it then hits the shutter curtain which opens for the amount of time you have specified. Many cameras are different, but the time open can vary from let’s say 1/8000 of a second to 30 seconds. Under certain circumstances, it can even be open for a longer time but that is the subject of another conversation. The light then strikes the sensor and is digitally converted to your photograph.
Shutter speed controls blur in your photograph. Too slow and your photo is blurry or over-exposed. Too fast and you risk underexposing your picture. When using a flash, most cameras will have a sync speed that synchronizes the shutter with the speed of the flash.
Finally, when talking about camera exposure, most cameras in this day and age provide you with three settings that will do the majority of the work for you. The first is Aperture Priority. Here, you set the desired aperture and the camera will electronically determine the shutter speed.
The second is Shutter priority. You set your shutter speed and the camera sets the aperture opening.
Finally, there is Programmed (some cameras will call it by other names but the function is the same). With this setting, the aperture will automatically change to match the shutter speed and vice versa.
I hope you enjoyed this article and if you have any questions or suggestions for future articles, let me know in the comments section. Please visit my web page at mysticalmomentsphotography.com to see more of my work or contact me.
